
![]() This page shows you how to configure TVHeadend so that you can watch the TV program with a client (mobile phone, PC, openelec). TVHeadend provides an interface for configuration via a web server. So you can connect to the server via any browser and do the configuration. The configuration is carried out using a DVB-S2 satellite receiver as an example. The settings of the TV receiver, the channel search and the basic setup of the video recorder are shown.
This page shows you how to configure TVHeadend so that you can watch the TV program with a client (mobile phone, PC, openelec). TVHeadend provides an interface for configuration via a web server. So you can connect to the server via any browser and do the configuration. The configuration is carried out using a DVB-S2 satellite receiver as an example. The settings of the TV receiver, the channel search and the basic setup of the video recorder are shown.
Abstract:
What do we need?
- RaspberryPi 3B+ (Advert)
with installed TVHeadend
- USB TV Tuner
- Webbrowser
- Optional: USB Flash Drive or external USB Hard Drive
Here it starts: Configure TVHeadend
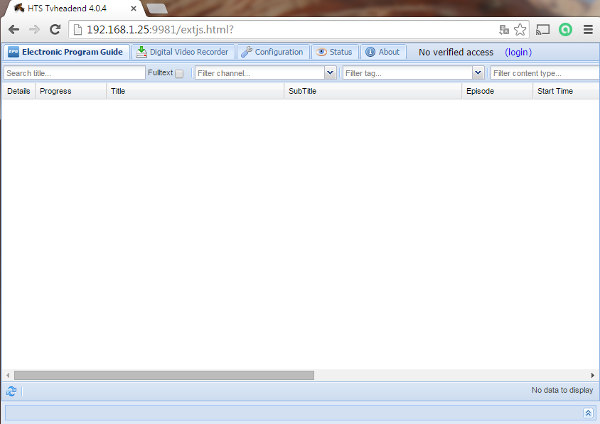
Connect to TVHeadend
Once you have ensured that TVHeadend is running, you can now connect to the server via a web browser. Start the browser and connect to the IP address of the server and the port 9981 of the TVHeadend web server.http://IPAdresse-TVHeadendserver:9981
General Settings
We now switch to the “Configuration\General” tab. There you should set the default language to “English” and in the area “Time Update” you activate “Update Time” and “Enable NTP driver”.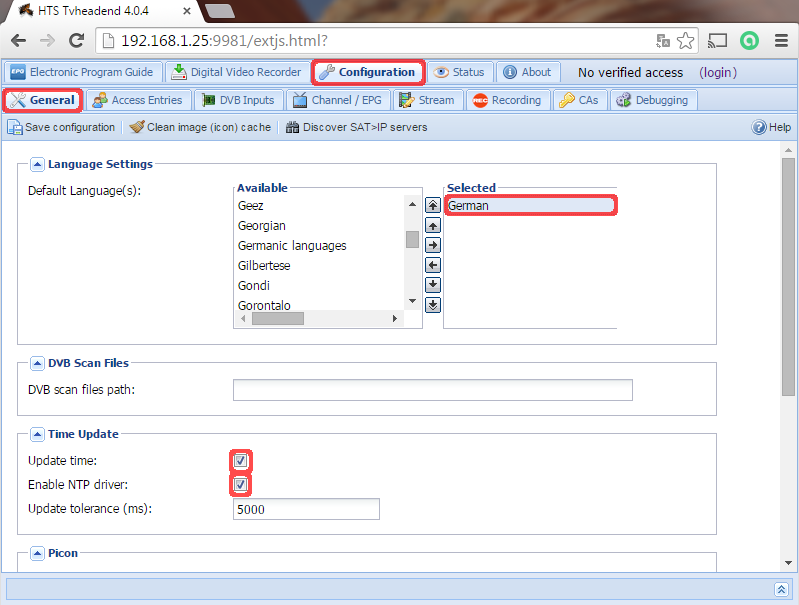
Configure Reciever
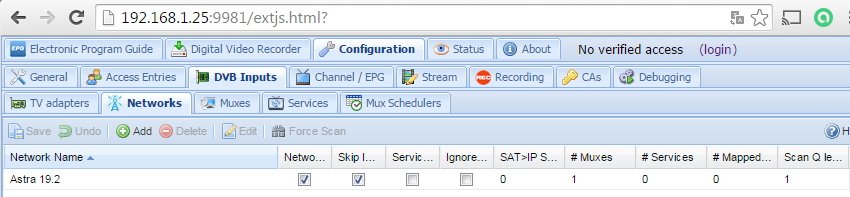
Once these settings have been made, navigate to the “Configuration/DVBInputs/Networks” tab. A network must now be added there. You have to select the appropriate network type for your TV receiver. In my case it is a DVB-S network.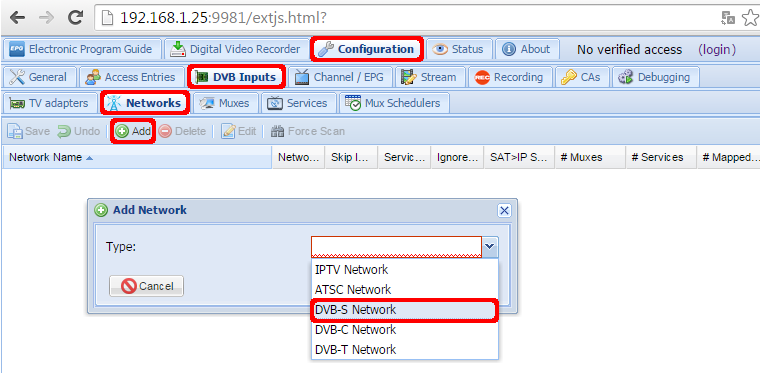
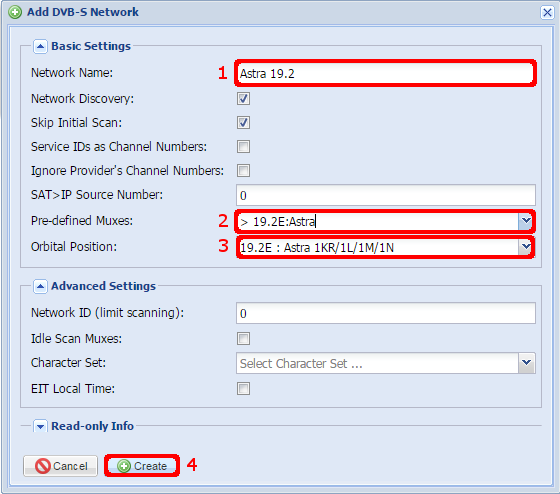
In the window that now opens, basic settings for the network you want to receive are made. To do this, assign a meaningful name [1] and then select the satellite to be received [2], in my case Astra 19.2 East. Then select the orbital position [3], here also 19.2 East. Once you have made the settings, click on Create [4].
Now there should be an entry as shown in the picture below.
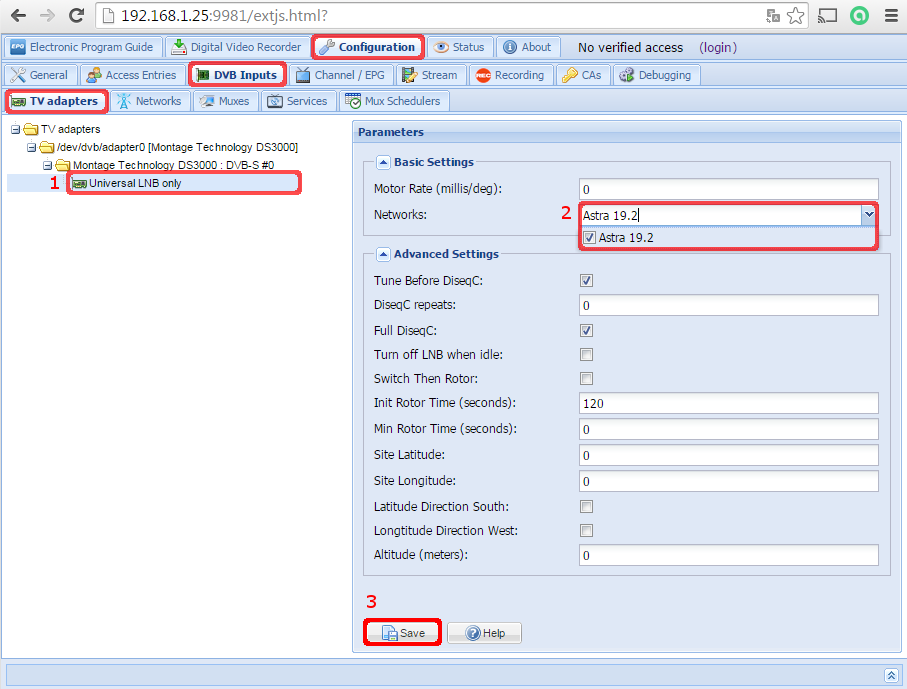
Now we switch to the tab “Configuration\DVB Inputs\TVAdapters”. Select the reception type of the TV card at [1] and then select the previously created network at [2]. Then save the configuration [3].
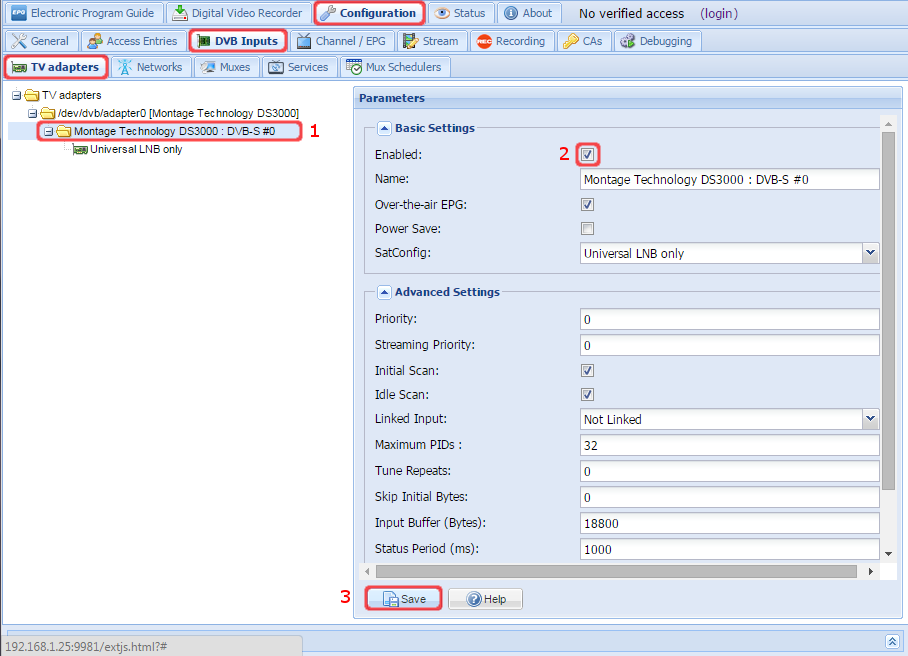
Now in the same tab of the TV card [1], the TV card must be “enabled” [2]. Then save again [3].
Scan Channels
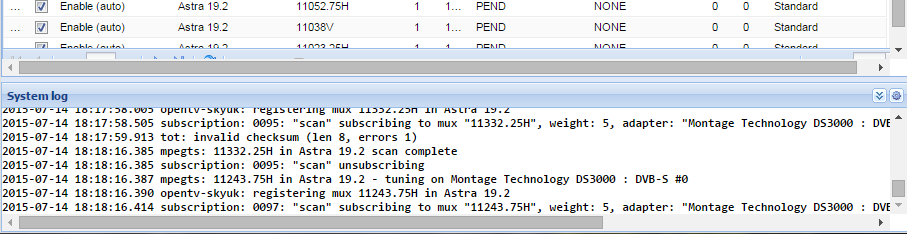
After activating the TV card, the scanning of the channels starts automatically. This can be seen in the “Configuration/DVBInputs/Muxes” tab. The scan status indicates whether the frequency has already been scanned (IDLE), is being scanned (ACTIVE) or should still be scanned (PEND). You can get some exact information what the tuner is doing by clicking on [1]. In the now expanding window the current action will be written.
Extended window:
If the scan status is “IDLE” at all transponders, the scan process is completed. Under “Configuratin/DVBInputs/Services” you can find the channels found during the previous scanning. If you click on “Service Name” the channels will be displayed sorted by name, now you should find a known channel.
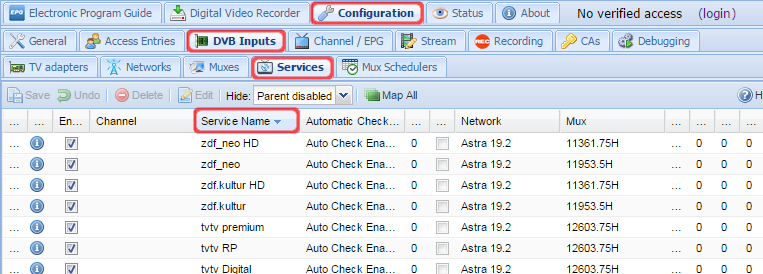
Select Channels
In this window you must now select the channels to be received via the TV Server. To do this, select the channel to be mapped and click on “Map Selected”. Then a window pops up, click here on “map”. LesserTip: Multiple selection is possible by holding down the “Ctrl” key. One should not mark too many at once, it is better only mark 20-30 channels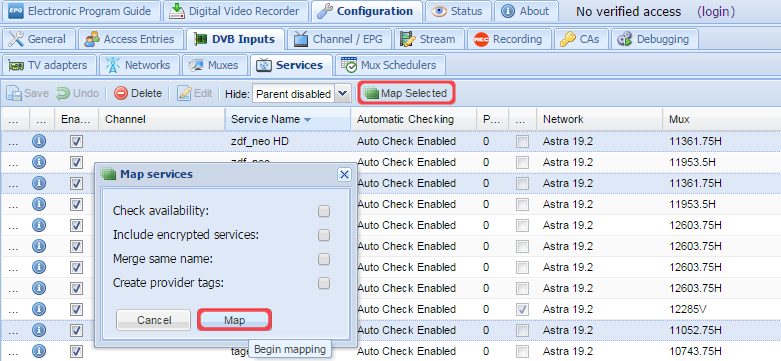
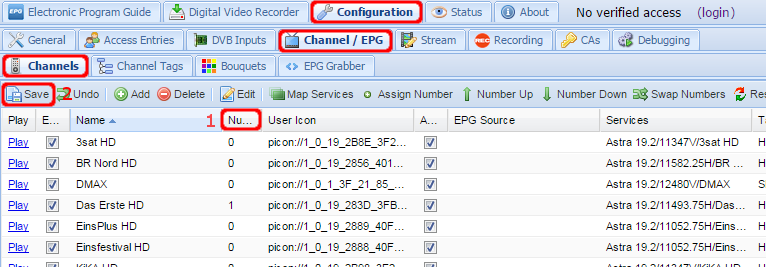
Once you have mapped the channels you can go to the tab “Configuration/Channel-EPG/Channels”. There you can see the mapped channels and can e.g. set channel numbers according to your wishes [1]. The settings must be saved [2].
Create User
Now we are almost finished, only a user has to be created to access TVHeadend with the client. Click on “Add” [1] under “Configuration/Acsess Entries” and make the settings as shown in the picture (except the user and the password 😉 ). Then click on “Create” [2]. Now a new user will appear which we will use later to dial in to the server with the client.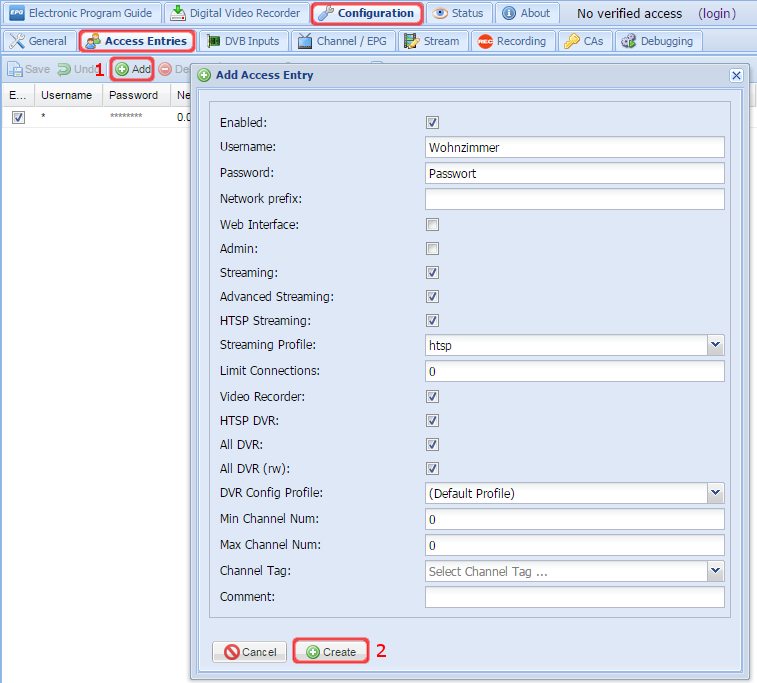
Configure Video Recorder
Now it’s time to configure the video recorder. Here we use the Default Profile [1]. The most settings are ok, we only adjust the folder where the recordings are stored. It can be entered at [2]. In order to have more storage space available it is recommended to include an external memory such as a USB stick or an external hard disk.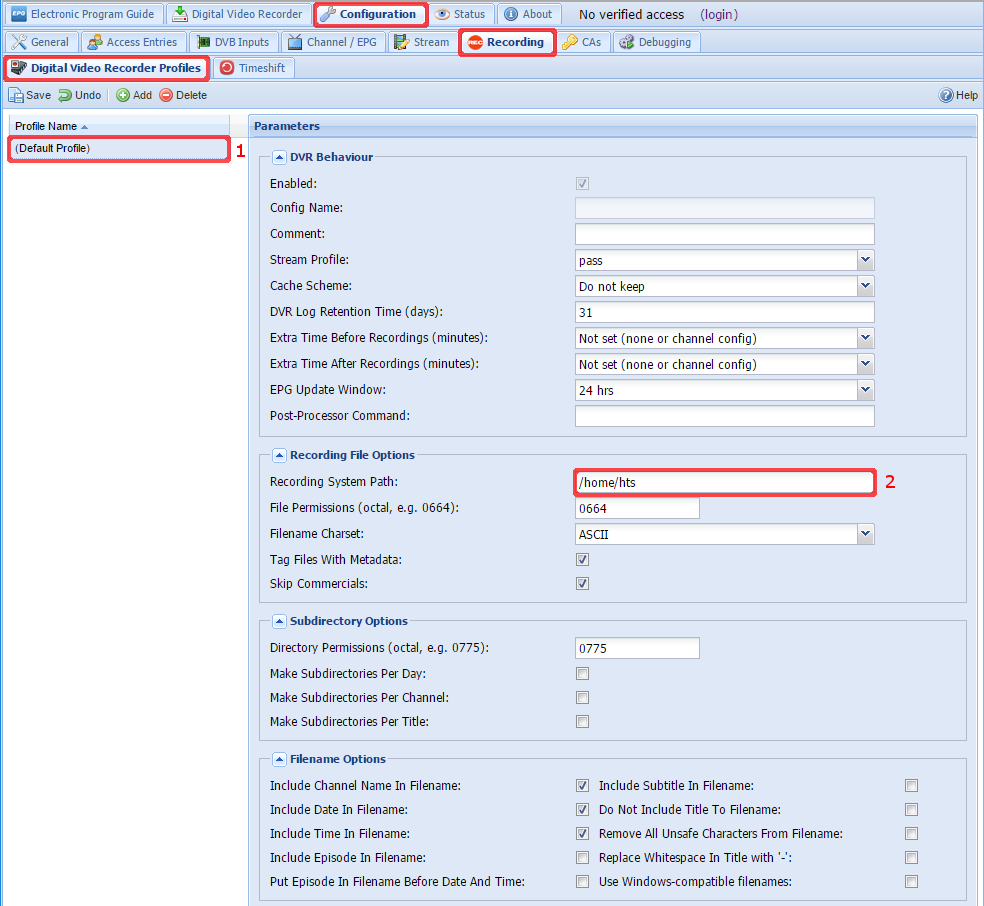
Now TVHeadend is configured and can be used!
Recent Comments